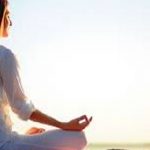


Whether taking a yoga class, practicing on your own at home, or following along to one of our top yoga classes online…
there are a few basic poses that you are almost guaranteed to see. While there are over 300 positions in the physical yoga practice (asana), these set the foundation for a well-rounded practice, whether practicing beginner yoga or advanced yoga. The following yoga poses are must-know poses for yogis of all levels, shapes, and sizes.
Remember to move slowly through each pose, connecting the movement with the breath. Pause after any pose you find challenging, and start again when your breathing returns to normal. Hold each pose for a few, slow breaths before moving on to the next one. It is likely that the head will begin to play games, chiming in and distracting you from your practice (read here for tips about how to quiet your mind during practice). Take it breath by breath. Breathe deep, tune back in, and let this practice feel sacred. Out of the head, and into the body and heart.
The best part? You don’t need any equipment other than your mat and yourself. Yoga is for everyone, everywhere. If you are a beginner, we recommend taking it slow. There is a difference between breathing into slight discomfort due to a new pose, and pushing to body too far/overstretching to the point on injury. This practice is for you. Let it serve you.
Let’s do this. Get out your yoga mat, and let’s get started with our top ten essential beginner yoga poses. (As always, check with your doctor before beginning a new exercise regimen.)
Essential Standing Yoga Poses
First, we will start with the essential standing yoga poses, like tadasana or mountain pose, and warrior one. These standing poses can be done on or off a mat, making them even more versatile.
Focuses on: whole body alignment
1.Stand tall at the front of your mat with feet as wide as your hips and parallel to the mat. Keep the weight evenly distributed through your soles, and the arms at your sides.
2.Squeeze the inner thighs together and internally rotate the thighs, rolling the inner thighs backwards. Anchor your tailbone down. rise up standing tall throughout your entire torso.
3.Draw your upper arm bones back and place your shoulder blades on your back, arms by your sides. Keep lifting up through the crown of head. Hug the lower ribs in toward the midline of the body while maintaining this standing pose.

Focuses on: core, ankles, calves, thighs, hips, spine, balance, posture
1.Begin in mountain pose or tadasana. Shift your weight into your left foot and begin to bend the right knee. Bring the sole of your right foot to you inner left ankle or shin, avoiding the knee. Use the right hand and draw your right foot up and place the sole against the inner left thigh. If this is too advanced, feel free to put the sole of your foot on the calve.
2.Keep the pelvis neutral and lengthen your tailbone towards the earth. When you feel stable, press the palms of your hands together at the heart center or begin to extend them above the head like tree branches. Repeat on the other side, with the legs reversed.
Modify: Place one hand on a wall for support or press the ball of the foot on the floor and rest the heel on the inner ankle.

Focuses on: hips, lower back, spine, chest, shoulders, groins, hamstrings, calves
1.Begin standing and step your feet one-leg distance apart. Turn your right foot so the outer edge of your foot is parallel with the long edge of your mat and angle your back foot towards your front foot 30 to 45 degrees. Align your heels on the same line. Inhale and reach your arms up in line with your legs. Exhale and hinge from your right hip. Reach your right waist long over your right leg.
2.Release your right hand to the outside of your right ankle, to your shin, ankle, or big toe, wherever feels best. Be mindful of compromising the extension of your right waist.
3.Micro bend your right knee and engage your quads to lift the knee cap.
4.Elongate the right side of the upper body by creating space in between your ribs. Roll your right shoulder back and away from your ear.
5.Press your right hand into the floor or your foot as your reach your left arm up to the ceiling. Allow your gaze to follow your left hand.
Modify: If you have high blood pressure, turn your head to gaze downward in the final pose. If you feel strain in the neck, simply continue looking down at the floor or straight ahead.

Focuses on: hips, shoulders, thighs
1.Standing at the front of your mat, take a giant step backward with your left foot and bend into your front, right knee. Keep the front toes facing the front edge of your mat.
2.Release the left heel down to the mat and point the back toes outward at a 45 degree angle.
3.Step your back foot out a couple of inches to the left to allow your left hip to come forward. Square your hips by drawing your right hip back.
4.Keeping the back leg strong and straight, internally rotate the back leg and root down through the outer edge of the left foot. If the outer edge of your back foot does not reach the ground, shorten your stance by bringing your back foot closer to the front of the mat.
5.Reach your arms up towards the sky. Relax the shoulders down the back and palms facing in. Pull the lower belly up and in. Pull the lower ribcage in toward the spine.
Modify: Vary the bend in the front knee and the position of the back foot.
*Both yoga poses warrior one and warrior two poses are similar, except for a few key differences. In warrior I, the arms are up towards the sky. In warrior two pose, the arms are opened up, tracking the front knee and back ankle with palms facing down with the hips slightly more opened to the left. In both poses however, there is a deep bend in your right knee, stacking it directly over your right ankle.

Focuses on: hips, thighs, outer calves
1.Begin in a standing pose and step your feet one-leg distance apart. Turn your right foot out so the outer edge of your foot is parallel with the long edge of your mat and angle your back foot towards your front foot 45 degrees. Keep your heels on the same line.
2.Reach your arms up in line with your legs and shoulders. Exhale and bend your front knee 90 degrees until your right thigh is parallel to the floor. Shift your shoulders over your hips. Bend your right knee more and press your knee out towards your little toe, engaging the inner and outer thigh.
3.Turn your palms up, engage your biceps, and then turn your palms back down without spinning the eyes of your elbows down, engaging the arms through the fingertips while keeping the shoulders away from the ears. Gaze just past your right middle finger and breathe deeply. Then repeat on the other side.
Modify: Vary the bend on the front knee to your ability.
Essential Seated and Supine Yoga Poses
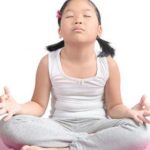
Now, let’s get into the essential seated and supine yoga poses that you’ll need to be familiar with when starting your yoga practice. All of these beginner yoga poses are to be done from a seated position and/or positioned on your mat.
Focuses on: abs, arms, spine, quadriceps, mind
1.Begin on your hands and knees, with your wrists directly under your shoulders. Spread your fingers and press down through your forearms and hands. Do not let your chest collapse.
2.Gaze down between your hands, lengthening the back of your neck and drawing your abdominal muscles toward your spine.
3.Tuck your toes and step back with your feet, bringing your body and head into one straight line.
4.Keep your thighs lifted and take care not to let your hips sink. If your butt sticks up in the air, realign your body so your shoulders are directly above your wrists.
5.Draw your pelvic floor muscles toward your spine as you contract your abdominal muscles. Keep your head in line with your spine. Broaden across your shoulder blades and across your collarbones.
6.Draw down through the bases of your index fingers.
7.Press the fronts of the thighs up toward the ceiling while lengthening your tailbone toward your heels.
Modify: Drop knees to the floor while maintaining core and arm engagement.

Phalakasana or “Plank Pose” >> click here for quick how-to video
Focuses on: arms, shoulders, back, hamstrings, calves, feet
1.Start on all fours with hands directly under shoulders, knees under hips.
2.Walk hands a few inches forward and spread fingers wide, pressing palms into mat.
3.Curl toes under and slowly press hips toward ceiling, bringing your body into an inverted V.
4.Outwardly rotate your upper arms to broaden the collarbones.
5.Let your head hang and move your shoulder blades away from your ears towards your hips.
6.Rotate your thighs inward, keep your tail high, and sink your heels towards the floor.
Modify: Keep a slight bend in your knees.

Adho Muka Svanasana or “Downward Facing Dog” >> click here for our free online pose directory
Focuses on: hip, hip flexors, piriformis (a deep gluteal muscle)
1.Begin in downward dog.
2.Start to come forward into plank pose and bring your left outer shin to the mat behind your hands. The outer left knee is on the mat behind the left wrist, and the outer left ankle is on the mat behind the right wrist. Your left foot can be drawn in toward the inner thighs or you can bring the left shin parallel to the front edge of the mat.
3.Aim to square your hips off to the front of the mat. If your hips are not very open, keep the foot drawn in closer to the body. Your leg should be in one straight line from your knee to your ankle to your toes.
4.Place your hands down onto the mat to keep the torso reaching high. To move deeper into the pose, begin to walk your hands forward and bow over your front leg, possibly even placing your forehead to the mat.
Modify: Bring a block or blanket underneath of the upper thigh of bent leg.

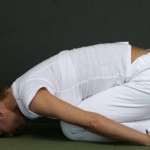
Focuses on: rest, lower back, hips, thighs, knees, ankles, spine, shoulders, neck
1.Kneel with your big toes touching. Sit back on your heels and as you exhale, begin to fold your torso forward and down over the top of your thighs. You can widen your knees to your comfort level.
2.Bring your forehead down to the mat in front of your knees and reach the crown of your head away from your neck. Hands can rest alongside the body (for a more restorative pose) or can be extended out in front of you (for a more active pose).
Modify: Rest your head on a cushion or block.

Focuses on: back, spine, chest, shoulders, abs
1.Begin by lying on your belly with your hands at the sides of your low rib cage, and your feet hip width apart, toes pointed.
2.Press into your hands, extend the arms, and lift the upper body off the mat. Press the tops of your feet into the mat, lifting your thighs and engaging your quads. Strengthen your hamstrings and press your tailbone down, as you pull your belly in towards your spine.
3.Roll your shoulders forward, up, and back.
4.Relax your neck and your jaw and stretch your legs more.
Modify: Just lift up a few inches, pressing palms into the mat without fully straightening the arms.

Conclusion of Essential Yoga Poses
Whether you want to explore standing yoga poses, or sitting yoga poses, there is a pose for everyone. It’s always a good idea to nail the basic yoga poses before taking on more complex poses. The top ten yoga poses above are essential to any type of yoga practice.
Remember if you’re just starting out, take it slow. Connect to the breath. Let it guide you through. Yoga is not about moving quickly or “getting it right”. It’s about tuning in, connecting to the breath, and surrendering to what is.