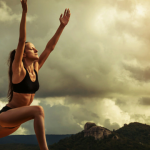

Downward Facing Dog or Adho Mukha Svanasana just may be the most well-known yoga pose…
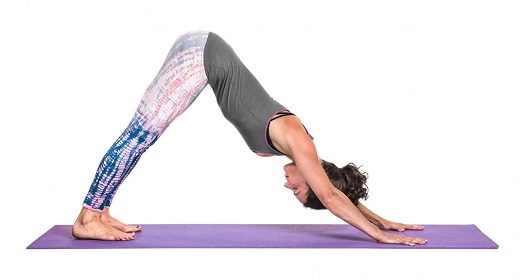
possibly thanks to our furry friends, who have a claim on the name of the pose. While in the tradition of yoga, Downward Facing Dog is considered to be a resting pose, don’t let that fool you! This pose requires strength, can tire out your shoulders, and move you deeper into your breath.
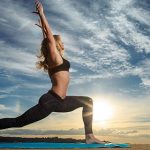
There are some common misalignments that happen in this pose. Tune in below for a step-by-step instruction on entering Downward Facing Dog. Align your body, ground down, and breathe to soak in all of the physical benefits of this shape.
Sanskrit Translation:
adho — “down”
mukha — “face”
svana — “dog”
asana — “pose”
STEP 1: Set Your Alignment
Begin on all fours with your hands shoulder-width apart, under your shoulders, and your knees beneath your hips, and your feet in line with your knees, also hip-width apart.
Spread your palms, and align the creases of your wrists so they are parallel to the top of your mat and your middle fingers are parallel to the sides of your mat.
STEP 2: Create a Strong, Grounded Foundation
Press the heel of your hand into the mat. Bring awareness to the knuckle of your index finger and thumb, pressing both down into the mat. It is common for the knuckle of the index finger to rise here and it is important to continue grounding down through that area of the hand to protect the wrists. Outwardly rotate the triceps, firming the arms to broaden across the shoulders and create more space in the chest and neck.
STEP 3: Lift Up and Back
Breathe in, lift your head and look forward. Exhale and tuck your toes under, lift your knees and stretch your hips up to the sky. Check that nothing changed in your hands. Let your head rest in between the biceps with space in the back of your neck.
Check that your feet are parallel and that your inner heels are hidden behind the balls of your feet. Stretch the line between your toes, and extend your inner and outer heel back. Micro bend your knees and align them in the direction of your second and third toe. Lift your sitting bones and press the hips back up, straightening your legs. Lengthen through the back of your legs. Heels of feet may or may not make contact with the mat.
STEP 4: Breathe
On every inhale, lengthen through the spine, stretch your arms, and press the inner triads of your hands into the mat. Every exhale, energize your legs and press the hips up and back. Maintain the grounded foundation and integration of the body.
Target Area:
Spine, Armpit, Shoulders, Chest, Legs
Therapeutic Focus:
Improves circulation throughout the body. Relieves pressure on the spine.
Benefits:
·Strengthens the arms and chest.
·Improves circulation, returning blood to the heart and brain.
·Stretches your shoulders, hips, hamstrings, and calves, and achilles tendon.
·Relieves tension in the cervical spine.
Props & Modifications:
If your hamstrings are tight, bend your knees to lengthen the spine. Remember the stiffness in your legs pulls on your spine, and downward-facing dog is a spinal pose. So adjust your legs to free your spine. Blocks under the hands and a strap around the elbows are great for stiff shoulders. A block under the head helps to induce a calming effect.